
Acoustic guitar has a variety of voicings, from the instrument itself as well as how it’s played. It can be full-range, evocative, and expressive.
Driving rhythms can also explode with surprising power. The softest whispers of delicate strings can frame quiet, emotional vocals.
The voice your guitar gives depends on so many factors and each of these impacts how best to capture the particular sound you’re after before you press the record button. Because of that, microphone technique is critical when recording.
So much nuance depends on which mic you choose and how you use it. Chapters can and have been written on acoustic guitar miking.
But it’s as much of an art as it is a science, so anything shared here should serve only as a starting point for your own fine-tuning and development of your own style.
However, you’ll find these tips and techniques turn up again and again in advice from top recording engineers. Don’t be afraid to break rules, but take care to learn them first.
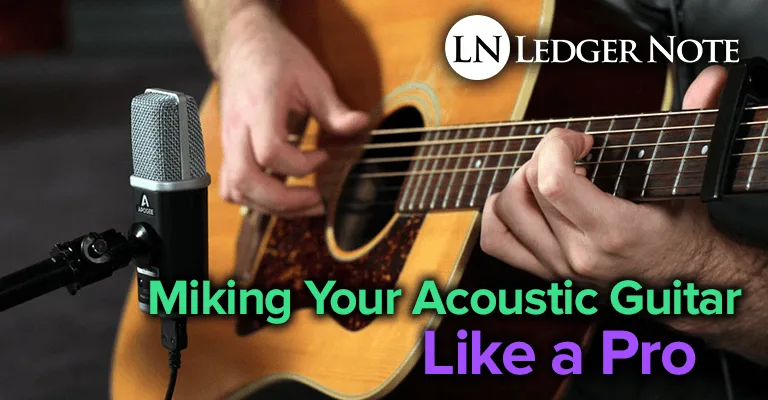
How to Mic an Acoustic Guitar
I’ll tell you about the three main factors that affect the quality of your results when miking acoustic guitar. The first has to do with having great microphones and preamps, the second relates to the impact the room itself makes on your audio, and the third is your acoustic guitar mic palcement.
Use The Right Mics & Preamps
If you’re not using the best equipment, you won’t get the best results. Or so it used to be.
Over the past 20 years, the home recording market exploded with new and increasingly affordable products; the net effect being more equipment of better quality in the hands of average users.
Yes, a top-of-the-line Martin guitar recorded with a Neumann U87 condenser mic through a Rupert Neve channel rack in an acoustically treated studio raises the potential for a transcendent acoustic guitar sound.
Yet, to get these kind of results you no longer have to spend $10,000 and more. Mics, preamps and even guitars have undergone a price and performance transformation that favors the typical home studio budget.
Guitars with solid wood tops are the norm even at modest prices now. While often the types of acoustic guitars for use are limited to those already in a musician’s possession, the chances of reasonable quality are better than a generation ago.
Still, if your own instrument is deficient in any way, beg, borrow, or rent a better instrument when necessary (like when you’ve rented 5 hours in a big studio and don’t want to risk your results not being as good as possible) or at least get a $50 professional restring and setup done before hand.
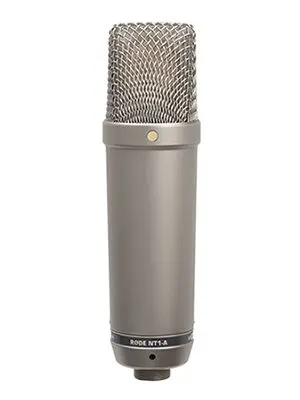
Limit your microphone options to condensers. Dynamic mics do many things well, but when it comes to acoustic guitars, they aren’t in their element.
Dynamic diaphragms can’t capture the delicate subtleties of an acoustic guitar’s rich top end. A condenser diaphragm responds in a much more appropriate way.
Either large or small capsule condensers are up to the task. A rule of thumb may suggest using pencil condensers for stereo miking and large diaphragms for mono techniques.
However, that’s more about size convenience. The reality is that either style of condenser can work in any approach. Spaced pair stereo configurations can even mix and match small and large format condensers together.
As with any mic application, use the best mic preamp you can. This is especially true if the acoustic guitar is the feature instrument on your track. There’s no place for weak components to hide. When your recording must be top notch, do your best to find the right stuff.
The Room’s Sonic Footprint
Home studios are often marvels of improvisation. Whether in a bedroom, basement, or garage, with the right techniques bleed and lack of acoustic treatment can be minimized with a proper microphone technique.
One great method is close-miking an acoustic and applying room ambience later creates very effective results from less than perfect sound spaces. If you’re featuring an acoustic guitar, however, consider finding a sonically impressive location and miking the acoustic guitar naturally in that space with the mic at a greater distance from the guitar.
Churches and performance halls are often excellent spaces to record instruments that benefit from coupling with a sound space’s natural reverb. There’s often an air of reality to natural ambience that’s very difficult to capture with a plug-in.
Acoustic Guitar Mic Placement
Mic placement is the second location consideration. There is a go-to focal point that serves as the target for almost all acoustic guitar mic techniques.
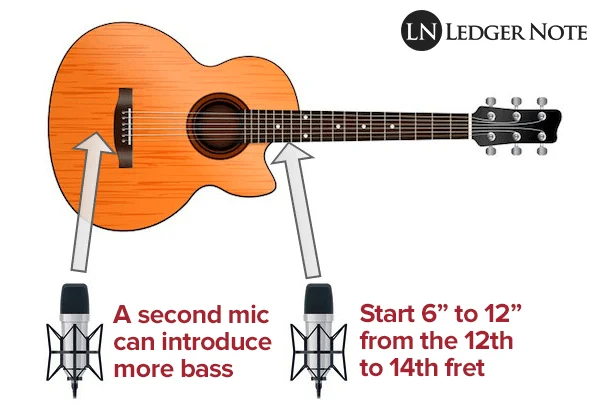
That spot is where the neck and the body come together, usually the 12th or 14th fret, depending on guitar style. The bottom of the neck — the side of the high E-string — is the preferred starting point.
In a less than ideal sonic space, tuck in close, no more than 6 inches away from the target spot. When you’re in a good ambient space, move back to 1 foot or more, but point toward the same spot.
Be careful getting too much closer than 6 inches or you risk encountering the proximity effect by accident. It can be used to great effect if done on purpose, though.

This target applies to single-mic recording as well as coincident pair and X-Y stereo techniques, but you need to also begin to consider phase issues and comb-filtering with more than one mic.
Pro-Tip: When using more than one microphone, make sure to follow the 3-to-1 Rule. This 3:1 Rule says to make sure the distance between the mics is three times that of the distance between the mics and the instrument. This will defend your recording against phase issues.
Slight positional adjustments of the mic(s) at the target position produce a wide range of finely tuned nuances. Once the mics are set, listen to the sound they provide. Adding more bass is as simple as turning the mic a bit toward the soundhole.
Less bass comes from a turn away from the soundhole. Tipping the mic up or down also changes the tone so experiment until you find the perfect spot. Don’t fix it in the mix!
In the future as you gain more experience you may want to explore the following acoustic guitar mic placements:
- Blumlein Configuration
- Horizontal Spaced Pair
- Veritcal Spaced Pair
- Mid-Side Setup
- X-Y Stereo Pair
- Close & Room Setup
- ORTF aka Side-Other-Side
These are only more ways to orient the mics (which we explore in depth in our instrument miking article) that don’t necessarily offer improvements, just options. The method illustrated above should be your starting point and will likely offer enough control that it’ll be your finishing point as well.
Note that large capsule condensers show greater changes in sound than small capsule condensers. Generally, the off-axis response of pencil condensers matches on-axis most closely. This assumes all mics have cardioid polar patterns.
Bit Rate, Sample Rate, & Levels
When it comes time to press record, a feature guitar track is the perfect place to use high-resolution sampling if your equipment supports it.
Using 24-bit/96kHz often seems extravagant when tracks are dithered down to 16-bit/44.1kHz CD quality. Yet, there are advantages in dynamic range that make recording with low noise easier with higher bit rates.

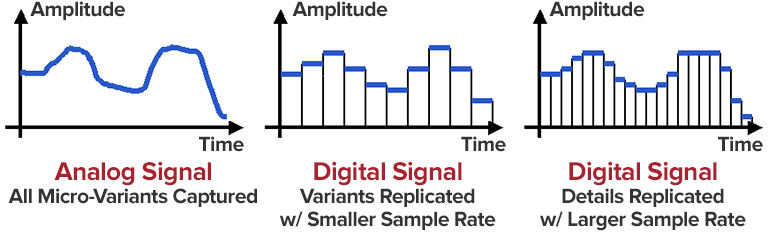
Even a moderately trained ear can sense the difference in richness with a 96kHz sampling rate, even after dithering. While the change is subtle, everything about recording an acoustic guitar is subtle. Just make sure you have the hard drive space for these higher quality recordings before you start.
Target an average signal range between -18dB and -12dB for recording input. This keeps the signal of the guitar adequately above the noise floor, particularly when using a 24-bit sample rate, without pushing the gain too hot at any point in the signal chain. This range gives adequate headroom for intense transients while keeping the soft passages on top of the noise.
Compressors, gates and expanders are fine for rhythm guitar tracks that will be buried in band mixes, but these have a way of sounding unnatural and interfering with the recording of a solo acoustic or within a small ensemble.
Miking Acoustic Guitar is Easy!
Perhaps the key to capturing the best acoustic guitar sounds is patience. Too often engineers cut time corners. They set up a mic in the same spot as always and run with it, making any changes with EQ or effects in the mix.
Sometimes they get lucky. Other times they deliver sub-par tracking to the mix engineer, passing the buck to them and hoping you never realize it.
Engineers who consistently get the best sounds from acoustics use mic placement as the most critical signal processing opportunity. Matching the guitar, mic, and mic position correctly make acoustic tracks much easier to work with. Nothing you can do in even your best DAW plugins can match what you do in the studio room.
You can’t always “fix it in the mix.”
If you aspire to recording the best sounds from your acoustic, take your time and use your ears when establishing your microphone technique. It will set you – and your guitar – apart from the lesser and lazier recording engineers out there. Don’t be lazy. Mic your acoustic guitar like a pro.