There's nothing better than MIDI programming for getting ideas out of your head quickly and accurately. The faster you can do this without the distractions of tinkering with hardware and software, the better. Staying in the left-brain mode can be the difference between a #1 hit and a dud.
When it's time to pump out a beat and the ideas are rolling, the last thing you want to do is sit down and try to find the exactly right kick drum or snare. With MIDI you can go ahead and create drum patterns, melodies, bass lines, and the works without waiting on a thing.
Then you can go back and choose the sounds. You can also change any of the MIDI data, such as note lengths, velocities, timing, and much more. If you're asking "What is MIDI?" then refresh yourself real quick before you jump in.
It's about as freeing as possible so you can separate the creative mind from the technical mind. But inevitably you always have to have one foot in the "How do I change this setting?" mode...
10 MIDI Programming Tips
You can minimize this down time and maintain your flow with these 10 MIDI programming and sequencing tips.
1. Choose How To Input Your MIDI Data
Some of us are basically stuck plinking in notes on our typing keyboards or clicking them in with a mouse, which is absolutely fine but not necessarily efficient. It's pretty darned slow, honestly.
But you may have a better background than the rest of us when it comes to playing instruments. This opens up an entire world of choices on how to record your MIDI data.
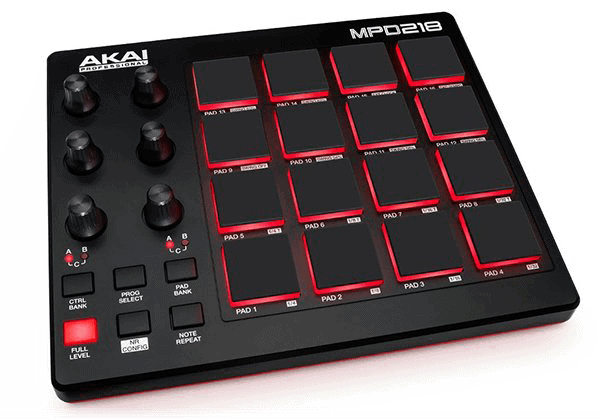
Almost any keyboard can output MIDI data and there's even MIDI guitars these days. Maybe you've got some skill at tapping beats on the table from all throughout high school... you can use a pad controller then!
Don't feel trapped like you have to use the mouse and click around on the piano roll. And definitely don't feel like you can't emulate a synthesizer on your MIDI guitar or pound out drums on your keyboard. Use any method that speeds up your workflow!
Just get the data in there and then you can choose sounds, apply effects, and tweak almost anything before you start mixing. Just make sure your sound card or your audio interface has a MIDI input if you go the hardware route.
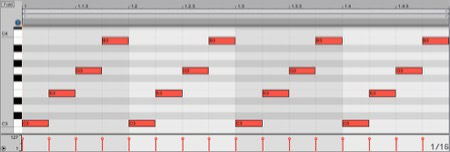
2. Edit MIDI Notes in Bulk
If you realize you'd like to change the velocity of every 8th high hat throughout the entire song, you can spend the time changing each one at a time. Or better yet you can select them all and change them all in one shot, but you still have to select them all.
Or best, you can use your DAW's logical editor (like Cubase's) to do all of the work for you.
Say you decide you want every note to last a bit longer but remain proportional to the current length. You want to add a 1/32nd duration to each, but some are 1/8th notes, some are 1/16th notes, etc. No problem!
Select them all with one drag of the mouse or keyboard shortcut and change them together. The best DAW's already have anticipated this kind of work and are set up for it. Quantize, swing, and anything else in bulk!
3. Enhance Your Arrangements With Pattern Sequencers
The way I prefer to lay out the base of my songs in terms of chord changes and song patterns is with patterns. You can do this in almost any big time DAW using plugins or simple looping options in the multitrack, but there are also DAW's like FL Studio that are entirely based on patterns.
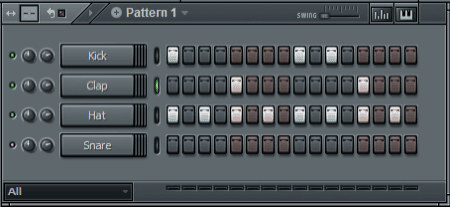
I'll make patterns to lay out the entire song and then go in and customize drum breaks and other pieces of "ear candy" well after the fact.
You can think of a pattern as a 2-bar, 4-bar, or even 8-bar loop that you create yourself. Then, instead of having to copy and paste tons of individual notes around, you can paste entire patterns. Sequencing suddenly becomes less of a time consuming drudgery and keeps you in the creative mode.
What you'll do is then copy the individual notes out of a pattern and then paste it into it's own MIDI region. From there you're free to customize the new region however you want.
You can also arrange the tracks in any order from top to bottom and even color code them so you can get a visual overview of your arrangement.
4. Automate Your MIDI Regions Like an Audio Take
Just like you can do with regular audio takes, you can automate MIDI tracks. This includes the normal volume, panning, and plugin parameters, but you also automate MIDI settings.
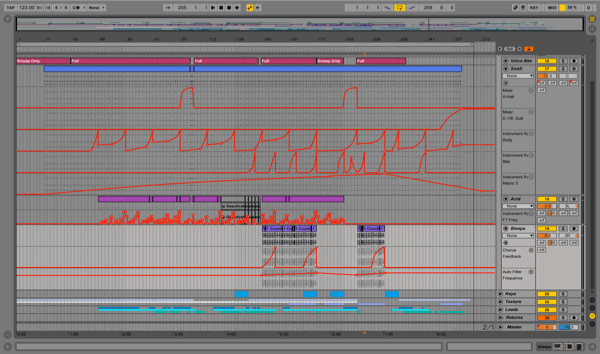
You can switch patches, presets, turn dials, and anything else, and then copy and paste that automation data around to other tracks as well. Of course these aren't one-time events. Sweep them suckers however you want over the whole track if you so desire!
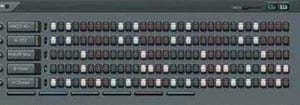
5. Program Your Drums or Melodies, Bass, & Harmonies Together
There's nothing worse than trying to have all of your drums playing killer rhythms with each other while starting on separate MIDI tracks. My recommendation is to program them all in one MIDI region and then later either explode them to individual tracks.
You can also re-route the lanes of the plugin sequencer to different tracks for mixing but this method will have a negative impact on how fast you can arrange and add in drum breaks, since everything is working as one pattern.
You can copy and paste the pattern to a new pattern and change it there and re-use breaks though... it's really a matter of preference. In the same vein, instead of exploding you can combine parts into one MIDI region.
Say you want to take the main melody, the counter-melody, and the harmonization and slap them all together for a violin trio sound in a bridge. You can combine, route each violin to it's own track, and mix from there.
6. Double Up For Bigger Sounds & Structure Improvements
One of the coolest things going on in rap beats these days is layered drums. But it's been taken to the next level by not only layering them but dropping one of the sounds out in certain segments of the song.
For example, a 4-bar section in a verse may have a normal snare for the first three hits, then the final of the four is backed by another snare with a huge, 3D reverb on it. Then when the chorus comes around the original snare drops out and the secondary one takes over, this time without the reverb.
- Check out these additional MIDI drum programming tips to bring your loops to life.
Another way of using this technique is triggering a sub-bass synth along with your kick drum and equalizing them in a way that they compliment each other, consuming the entire bass region of the frequency spectrum while maintaining a bit of harmonics so it's more easily heard by the listener.
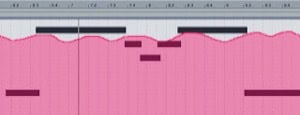
7. Quantize or Humanize Your Rhythm
If you typed in every hit my hand with your mouse, your song will sound too perfect. If you played it all in on MIDI guitar, your timing might have varied here or there and be too loose.
You can correct either one by quantizing to any time division you want or even adding variation back in by humanizing perfect (unrealistic) timing.
If your MIDI programming timing is sloppy, tighten it up a bit. If it's perfect, ruin it a bit. Another trick is to automate velocities too, since no human will hit a drum or strum a string at the exact same velocity every single note for minutes on end. Randomization is the ticket!
Listeners expect perfection, but what they don't realize is that perfection just sounds "off" to them. Make sure your songs have the human element of small variations in timing and velocity. You fans will connect more deeply and will never know why.
8. Route Your MIDI Data to External Sound Banks
You aren't stuck with whatever default sounds came with Cubase, Logic, or Pro Tools. You don't have to buy CD's and install more sounds or plugins.
You might have an awesome keyboard like a Korg Triton or Yamaha Motif with awesome sounds. You can export your MIDI data out to your keyboard and have it play automatically and record those sounds back in as audio tracks!

Did you know you can buy all of these classic keyboard sound banks without the keyboard? You can mount them right into your rack and have a Triton, Motif, and a Roland Fantom all at your disposal!
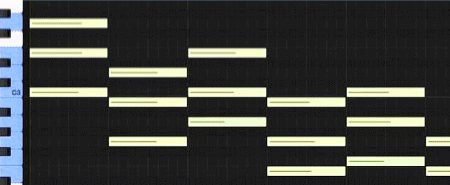
9. Use Arpeggiators to Establish Grooves
Electronic dance music is creeping into almost every genre in some way or another. One of the keys to getting that spaced-out, synth-based club vibe is to use an arpeggiator to drive your MIDI.
Arpeggiators create climbing and rising patterns. There will be tons of presets that will sync right in time with your project based the tempo and even jump right into key. Using it on high-end synth lines or on a bass line is a fantastic way to create a trance groove.
Once you establish a groove you like, you can convert it to MIDI data for alterations throughout the song structure.
10. Keep the Arrangement Realistic
Another aspect that a lot of amateur MIDI musicians make is going overboard. You have the freedom to do whatever you want to any degree. But less is always more.
Your listeners don't always realize it but it's hard to connect emotionally to the sound of a drummer with 5 arms. You need to think about what it is you're doing and keep it realistic.
There's no polyphonic flutes with overlapping notes played by a player with the lung capacity of an elephant.
Give the "player" time to breathe. Make his exhales waver a bit like a vibrato almost. Make it sound real!
Bring Your MIDI Programming to Life
I'm as guilty as the next. Most of us are so gung-ho about making beats that we jump right in and never take the time to explore our software and find all these secrets and shortcuts. These types of MIDI programming and sequencing tips are what separate the pros from the amateurs.
You need to be pumping out volumes of beats for artists to pick through. The longer you can stay in the creative mode, the better. That's what these MIDI programming tips help you do. Good luck and keep on grinding!
Jared H.
 Jared has surpassed his 20th year in the music industry. He acts as owner, editor, lead author, and web designer of LedgerNote, as well as co-author on all articles. He has released 4 independent albums and merchandise to global sales. He has also mixed, mastered, & recorded for countless independent artists. Learn more about Jared & The LN Team here.