Gain Staging Explanation Through Hardware & Software
When we got this question, it was another in a string of emails asking for more information about gain staging. It's something we've mentioned a lot in the Studio Recording column but hadn't dedicated a full article to it.
We since then have written a full investigation into the concept (linked below), but here's the shorter version of how we explained it to Hechter. Please check out the longer explanation for more detail.

We goof up so much that in these Q&A posts we can always thank a reader for correcting a mistake elsewhere, and this time the props go out to Luke for spotting a geometry error on the circle of fifths article and Daniel for catching a Beatles history factoid issue. On to the question.
Can You Walk Me Through Gain Staging?
Question:
I read your article on the 14 Tips for Vocal Recording and found it to be very informative. However, in setting up for correct gain staging I was not able to follow the directions (I'm a newbie). I'm currently using GarageBand with a Focusrite Solo interface.
You indicated that step 1 is to put the master gain on the interface at 0 dB. Did you mean the gain knob on the interface all the way to the left or the master slider in GarageBand? Step 2, you said, involves adjusting the gain on the preamp channel you're using... would this also be the gain knob on the interface? Again, I'm kind of new at this and it seemed a bit confusing.
Thank you,
Hechter
Answer:
Hi, Hechter. Thanks for reaching out.
You're not the first person to ask this topic and we plan on creating a Gain Staging article to help explain further. [As promised, it's live!]
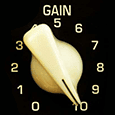
When we say set your sliders and gain knobs to 0 dB, that doesn't mean "as quiet as they can go." It sounds that way but what it really means is to set them straight up the middle (usually pointing straight up) so that you're not adding or taking away volume. Each of these knobs are to be set at a "neutral" setting where they don't interfere at all, sometimes called "unity." It's almost like a factory reset.
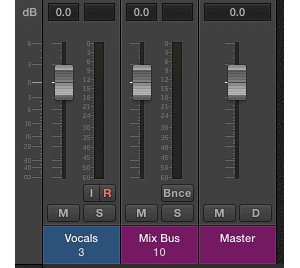
This also goes for the interface master output gain and as well as your software's track and master faders. What happens is by setting these to 0 dB you get them out of the way entirely.
They aren't a part of the gain equation now, but are set in a way that you'll be outputting at the right volumes from your other gear, and this maximizes your headroom and bit usage (without going too far into peaking, clipping, and distortion).
Now, you control your volume solely from the preamp's gain stage. This makes it so you're getting the best quality out of your preamplifier while then hitting your analog-to-digital converters at the right volume too. Once you're set here, you can begin manipulating your volumes with the faders while still maintaining the right gain staging at the preamps and the converters.
I see why this is confusing though. The Focusrite Solo itself (a wonderful interface by the way with decent preamps, I use the Focusrite Saffire Pro 40 myself with the same ones although I have better outboard preamps), doesn't have a "master gain."
It only features preamp gain. This means the master gain is already set where it should be. I think most interfaces don't actually have a master gain like a physical digital mixer board would have. It also helps to understand the difference between gain and volume more deeply in order to make full sense of this.
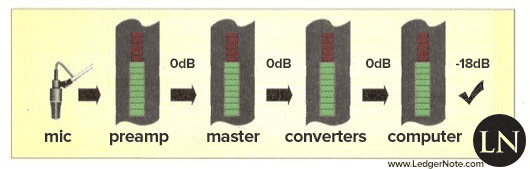
I hope this helps. In your case, you just want to control your preamp gain until you're input is dancing around -18 dB in the software, pre-fader. This means you want to observe your levels without the influence of the volume fader interfering, which again means setting the fader to 0 dB.
Once you've set up your preamp's levels and have recorded your tracks, you can start messing with the volume of the tracks while still aiming for a final mix level getting near 0 dB in the DAW. You'll have to take away, add, compress and compensate for that, etc.
You will knock it all out of balance and that's expected, only on the individual track faders though. The important part is getting the hardware levels set properly, and make sure to check these each time you start recording.
Good luck, please hit us back if you need more help!
Jared
Jared H.
 Jared has surpassed his 20th year in the music industry. He acts as owner, editor, lead author, and web designer of LedgerNote, as well as co-author on all articles. He has released 4 independent albums and merchandise to global sales. He has also mixed, mastered, & recorded for countless independent artists. Learn more about Jared & The LN Team here.