If you're reading this, then the assumption is you understand how a typical audio compressor works (I'll summarize it below anyways). That full-band gain reduction tool is crucial to all mixing engineers.
So then what is this mysterious multiband compressor and why does it deserve its own separate name and category of existence? It's still just a regular compressor, the kind you're used to dealing with, but with one special twist.
I'm going to explain what these things are and why they're unique, how they differ from a similar signal processing tool we all use, when to use them, how to use them, and then I'll wrap it up by giving you a few real-world examples.
What is Multiband Compression?
A multiband compressor is nearly identical in function to a standard studio compressor except that rather than processing the entire frequency band it can focus on separate, definable frequency ranges all at the same time.
To state that in another way, when you set up a regular compressor it's going to act on the entire spectrum of human hearing from 20 Hz up to 24 kHz (and below and above). With a multiband compressor, you can tell it to only focus on a specific range, like 20 Hz to 150 Hz.
The easiest way to understand this is to think of it as a mixture of a compressor and a parametric equalizer, which is an EQ with definable frequency ranges. Let's look at this specific comparison deeper and it'll make full sense.
What is the Difference Between Multiband Compression & Parametric EQ?
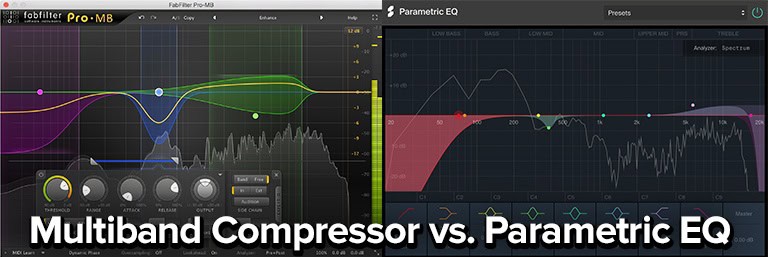
Both a multiband compressor and a parametric equalizer allow you to define specific bands of frequencies to act upon. Usually we use both a compressor and an equalizer for the task of gain reduction (lowering the volume).
The key difference between an equalizer and a compressor is that if you apply gain reduction with an EQ, it will be a constant and persistent reduction throughout the entire audio track. If you apply gain reduction with a compressor, it only acts when the amplitude of the audio exceeds the threshold set by you.
And that's the core difference between the multiband and parametric varieties of these tools. They work the exact same, but a compressor applies a momentary gain reduction while an equalizer applies a constant reduction in volume.
Why that difference exists will become apparent as we talk about when and how to use multiband compression. The short answer is that momentary processing gives us far less destructive options while mixing.
When Should I Use Multiband Compression?
There's one question you should always ask yourself before reaching for a multiband compressor plugin. How you answer it will tell you if you need the compressor or would be better suited using a parametric EQ. And that question is:
Is the problem I'm facing one that is persistent over the length of the entire track or song, or is it dynamic in the sense that it's only a problem at certain times?
If the problem is a constant issue then you want to use a parametric EQ. If it only occurs at certain times, then a multiband compressor is the tool for the job.
An example would be a vocal recording that is has too much 200 Hz to 500 Hz the entire time versus when it only sounds boomy when certain phrases are sung.
When it comes to mix bus compression, group buses, or during mastering, my recommendation is to always fix the problems by returning to previous steps. That means working with individual stems or tracks in the mix. Never "fix it in mastering" when you still have access to mixing procedures.
The reason not to use it on groups if you can avoid it is that a compressor will act on all instruments in the group regardless which individual instrument it's reacting to. So while your kick drum might be too loud and you're trying to reduce that in volume, you'll do the same to your bass line, too.
How to Use Multiband Compression
The thing to realize is that, when you define your three or four frequency bands, your audio signal is split into three or four separate signals (with some crossover). The entire point is to gain independent control over these frequency bands.
A Note on Crossover Frequencies
People often ask which crossover frequencies are best, meaning they want to know which frequency ranges to choose to process. It doesn't work like that. You have to use your ears. Every individual track, mix bus, or song that you're mastering will be different.
The only thing that can be said is, when using this tool on groups of instruments or full productions, try not to set them in the middle of any instruments main frequency ranges. You'll alter their sound drastically by reducing a part of its volume but not the rest. Reference these frequency range charts if you aren't sure what I mean.
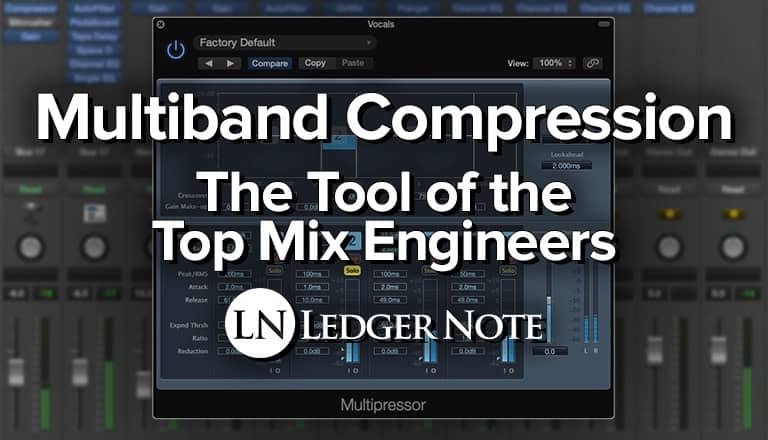
Here's the general outline that you'll follow every time you use this tool, for every band that you're isolating. I'm going to show you what it looks like in Logic Pro's default plugin, though I recommend the fabfilter Pro-MB if you can afford the expense.
1) Add the Plugin & Understand It
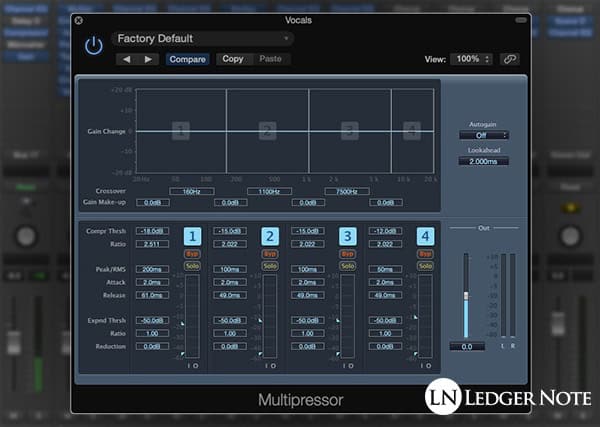
Obviously you're going to add your chosen plugin to the right track, but each one is different so I want to say a word about that. Some plugins will load with 3 or 4 bands of frequency ranges as default, like Logic Pro's Multipressor. The fabfilter Pro-MB loads without any. In any case, you have to add at least one band.
In some cases, you can only define the frequency ranges if more than one band exists. On the Multipressor I leave all 4 default bands enabled in order to achieve this and save time. In the Pro-MB you can define a single band with it being the only one enabled. You'll have to learn your specific plugin.
2) Define Your Frequency Range & Solo the Band
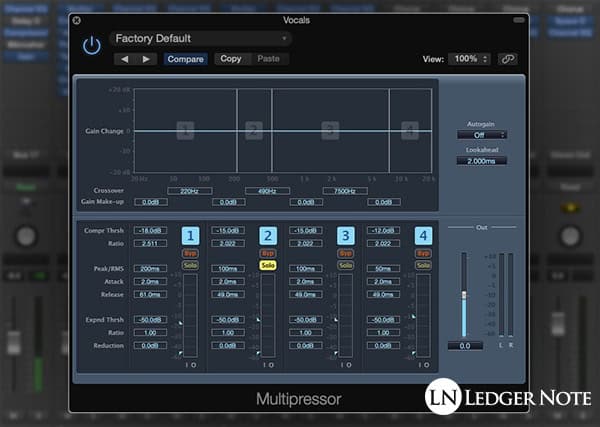
In most cases you'll likely ever only use one band. But in the case that you do use more, it works the exact same way for each band. The first thing you want to do is choose a band (I chose #2, it doesn't matter which) and press the "solo" button, meaning it will be the only one to allow sound through.
You're effectively muting all of the other bands when you do this, which lets you listen in on exactly the frequency ranges you're selecting. This lets you laser focus and find the exact problem frequency range.
So in the case above, I know that, due to my room's acoustic problems, that when my vocals get too loud on certain phrases that the room's reverb causes a boomy, muddy sensation. So I dragged the sides of the band around (the crossover points) to narrow down specifically in the band where the problem occurs.
You can see I settled on 220 Hz to 490 Hz, a fairly wide range for "mud," but it's what was needed in this case. From here out, we treat it just like any other compressor.
3) Listen As You Adjust the Parameters
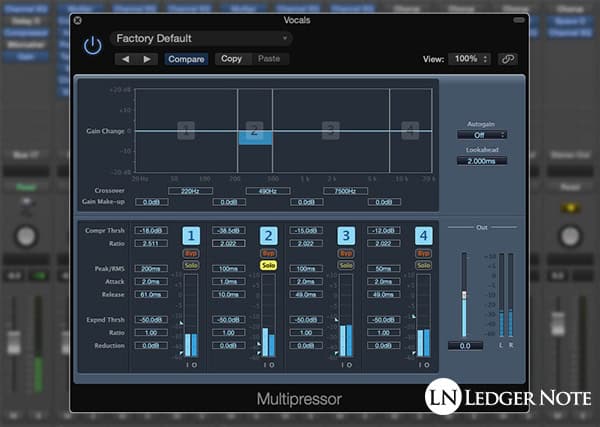
I have to assume that you understand how a compressor works, but if not I broke it down sufficiently in our How to Compress Vocals article recently. The very quick version is that you need to set a ratio (use something light and transparent like 2-to-1 or even less.
We're just trying to quieten the boomy sound a bit, not squash it. I'd recommend a fast attack and release in this case (1 millisecond & 10 milliseconds, respectively). Now loop the segment of audio where the problem occurs and listen as you slowly decrease the threshold.
Don't worry about the amount of gain reduction to aim for or anything of the sort. Listen with your ears and keep decreasing the threshold until it sounds right. Then back off a bit as a rule of thumb. Do not use makeup gain!
4) Unsolo the Band & Tweak to Taste
Don't assume that because it sounds good with the frequency band in solo mode that it will sound good altogether. Unsolo the band but keep the track as a whole in solo mode. Now you can listen and make sure you choices sound good with the full vocal track playing.
Once you tweak there and it sounds good, unsolo the track and listen to your changes in the context of your entire mix. It may sound fine or you may want to make additional changes. Once it's good, it's good! All there is to do now is rinse and repeat anywhere else you wanted to use this wondrous tool.
Three Multiband Compression Examples
Let me give you just a few quick examples of how you might use this tool. These applications are the most common, and though there's a ton more I could list, this will get your creative mind working and you'll discover those other methods and create even more for yourself.
1) On Vocals
The entire guide above was about an example with vocals where they became boomy and muddy during louder phrases due to the acoustics of the room used during recording. In just the way you can target bad low and middle frequency characteristics, you can target high frequencies.
An example of this would be for sibilance, where certain sounds (like S and T sounds) create piercing bursts of air. Turning those sounds down is the job of a de-esser, which is just a single-band multiband compressor. Another way to think of a de-esser is as a compressor sidechained to an equalizer.
2) On the Drum Bus
Getting a balance between the kick drum and bass is always a problem since they share similar frequency ranges. Sidechain compression is a great option to duck the bass, but that's not always an option. With a multiband compressor you can target that frequency range (40 Hz to 100 Hz typically).
Imagine you only have stems to work with and you need to turn down the kick but you can't EQ it without affecting the bass too. You can use a multiband plugin to target the kick, use a slower attack so the transient pops through still, and avoid changing the harmonics of the higher frequencies. And doing so momentarily leaves the bass alone.
3) During Mastering
Many amateur musicians at home tend to take a stab at mastering their own tracks. This tends to involve slapping a compressor on the master bus, getting about 3-5 decibels of gain reduction, and then slamming it into a limiter.
With multiband capabilities you can target exactly the problem areas, sculpt entire regions to tighten and provide glue to a song, or redefine areas like the bass region only. This is an entire skillset to master (no pun intended) and you're best off leaving it to a professional.
Multiband Compression is a Mix Saver!
No tool is more powerful, though it may have an equal in the parametric equalizer. Many a mix has been saved using this tool, and even more have been ruined by placing this tool in the hands of an amateur. That's alright, we all have to learn by messing up. But don't send those tracks out to your listeners. Leave it to a pro!
While a parametric EQ lets you target specific frequency ranges, it does so in a constant fashion, effecting the track even when you don't want it to. Only one tool advances past that, giving you momentary control, and that's multiband compression.
Jared H.
 Jared has surpassed his 20th year in the music industry. He acts as owner, editor, lead author, and web designer of LedgerNote, as well as co-author on all articles. He has released 4 independent albums and merchandise to global sales. He has also mixed, mastered, & recorded for countless independent artists. Learn more about Jared & The LN Team here.